Writing Articles Online
This document explains how to use Quail's online editor to write articles. If you use Markdown editors like Obsidian, you can refer to the "Obsidian Plugin".
Article Title and Slug
The article title refers to the title of the article, which will be displayed in the title bar of the article page. The article asluglias is a unique identifier for the article and will be displayed in the URL of the article page. Generally, the article slug is the English translation of the article title or the pinyin of the article title.
For example:
- Article title:
Introduction to Quail: Understanding Quail in Five Minutes - Article slug:
quail-introduction-five-minutes-to-understand-quail
Quail provides a feature to automatically generate article slug. You can click the "AI Guess" magic wand button on the right side of the article slug input box, and Quail will automatically generate an article slug based on the article title.
Article Cover, Summary, and Tags
The article cover is the featured image of the article, which will be displayed at the top of the article page and in the article list.
Authors can upload their own article covers or use the free images provided by Unsplash. If you use images from Unsplash, please follow the steps below:
- Click the "Unsplash" button on the right side of the cover image.
- Enter keywords in the pop-up box to search for images.
- Select the desired image and click the "Select" button.
- The image will be automatically inserted into the article, and Quail will automatically add the image source and author information for you.
The article summary is a brief introduction of the article, which will be displayed in the article list and in feeds and search engines. The article tags are labels associated with the article, which will be displayed on the article detail page.
Quail provides an AI feature to extract article summaries and tags. You can click the "AI Guess Metadata" option in the dropdown menu at the top right corner, and Quail will automatically extract article summaries and tags based on the article content.
Article Content
Markdown Syntax
Quail uses Markdown syntax to write articles. Markdown is a lightweight markup language that allows authors to focus on content rather than formatting.
If you are not familiar with Markdown syntax, Quail provides a quick reference for Markdown syntax within the online article editor. You can click the "?" button in the top right corner of the editor to view it.
Inserting Images
Similar to the article cover, authors can choose to upload their own images or use the free images provided by Unsplash. The toolbar buttons have the same functionality as the article cover, so we won't go into detail here.
Inserting Embeded Objects
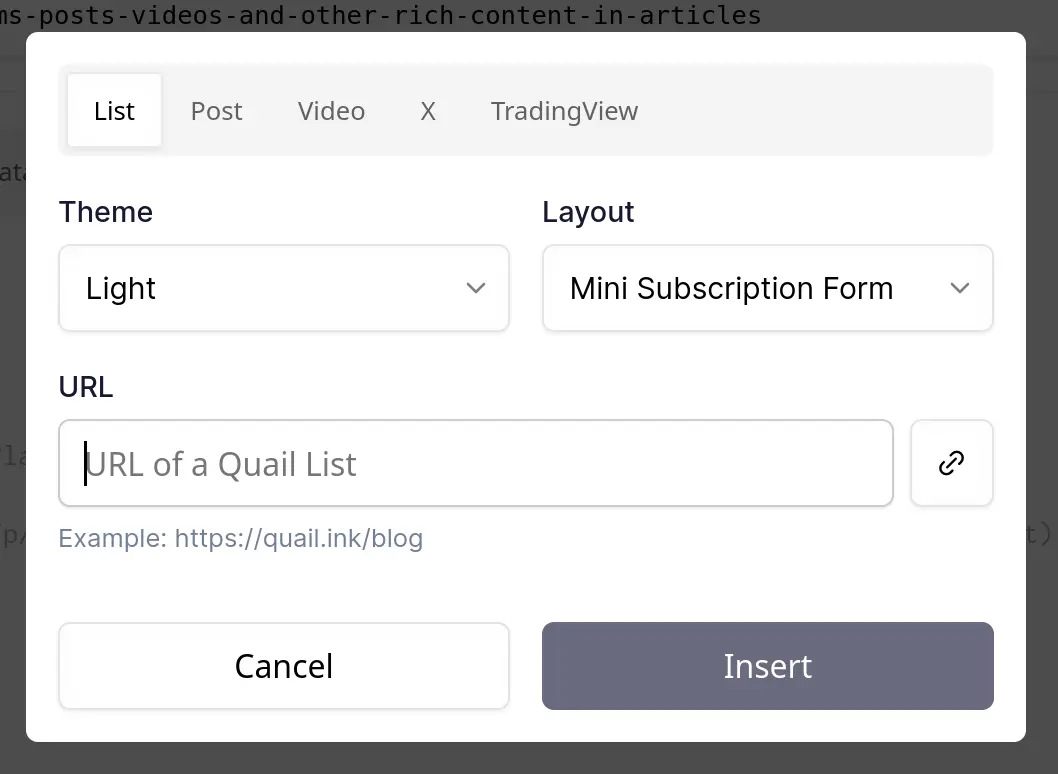
The new embedding feature offers a variety of content types to enhance your posts:
- List: Easily embed curated lists from Quail to provide relevant information to your readers, or ask your readers to subscribe your newsletter
- Post: Integrate Quail's posts to articles offer additional insights.
- Video: Embed youtube videos directly into your content to create a more engaging and interactive experience.
- X's Post: Embed X's Post (formerly Tweet) into articles.
- TradingView: Include live financial data and charts from TradingView to keep your audience informed with real-time financial information.
How to Use Embedding Feature
Using the embedding feature is simple and straightforward. Follow these steps:
- Write the article and move the cursor to the position where you want to insert the embedded object.

- Choose the content type and select the object you want to insert: list, post, video, X's post, or TradingView chart, and fill in the corresponding link.

- Click the "Insert" button to embed the object into the article.
Inserting Members-Only Content (Paid Tag)
Quail allows inserting a paywall in the article. After inserting the paywall, the content before the paywall is free, and the content after the paywall is only readable by premium members.
Here's how you can do it:
- Write the article and move the cursor to the position where you want to insert the paywall.
- Click the "Insert Paywall" button (a Spock gesture) in the editor toolbar.
- The paywall tag
<!--paywall-->will appear in the editor.
After publishing the article, Quail will enable the paywall for that article.